Showing posts with label Tips and Tricks. Show all posts

Friday, December 26, 2014

Christmas Project Roundup

I had fun creating a few things for my family for Christmas. I also got a fancy new iron and decided to act as an angel swapper for the instagram mini swap. These were all great projects and I'm excited to share them with you today!

First up is a Makeup bag (tutorial here) and Two in One Zipper Pouch (pattern here). These are number 18 on my 2014Q4FAL list and were also my December ALYoF goal. These were so fun to make with their combination of Japanese canvas weight and quilters cotton from Joel Dewberry's Birch Farm line.

Here's another angle of the 2in1 pouch. This is the third one I've made of these and I just love them! They are so fun and useful and the pattern is really well written.

I really love how this one turned out too. I did the larger size from the tutorial and it ended up being a great makeup bag size. I laminated the lining with some Heat and Bond and I really wish I didn't. It seemed like a great idea at the time, easy to wipe and all that but the process of box pleating and turning and flipping the fabric made tiny perforations and tears in the plastic. It would have been much more durable without the laminating and could have just gone in the wash. Lesson learned.

I knitted my first Christmas gift. I picked up knitting about two months ago and just love it. This hat and cowl were for my Step-Dad.

Here he is all ready for the Massachusetts snow (that they currently don't have).

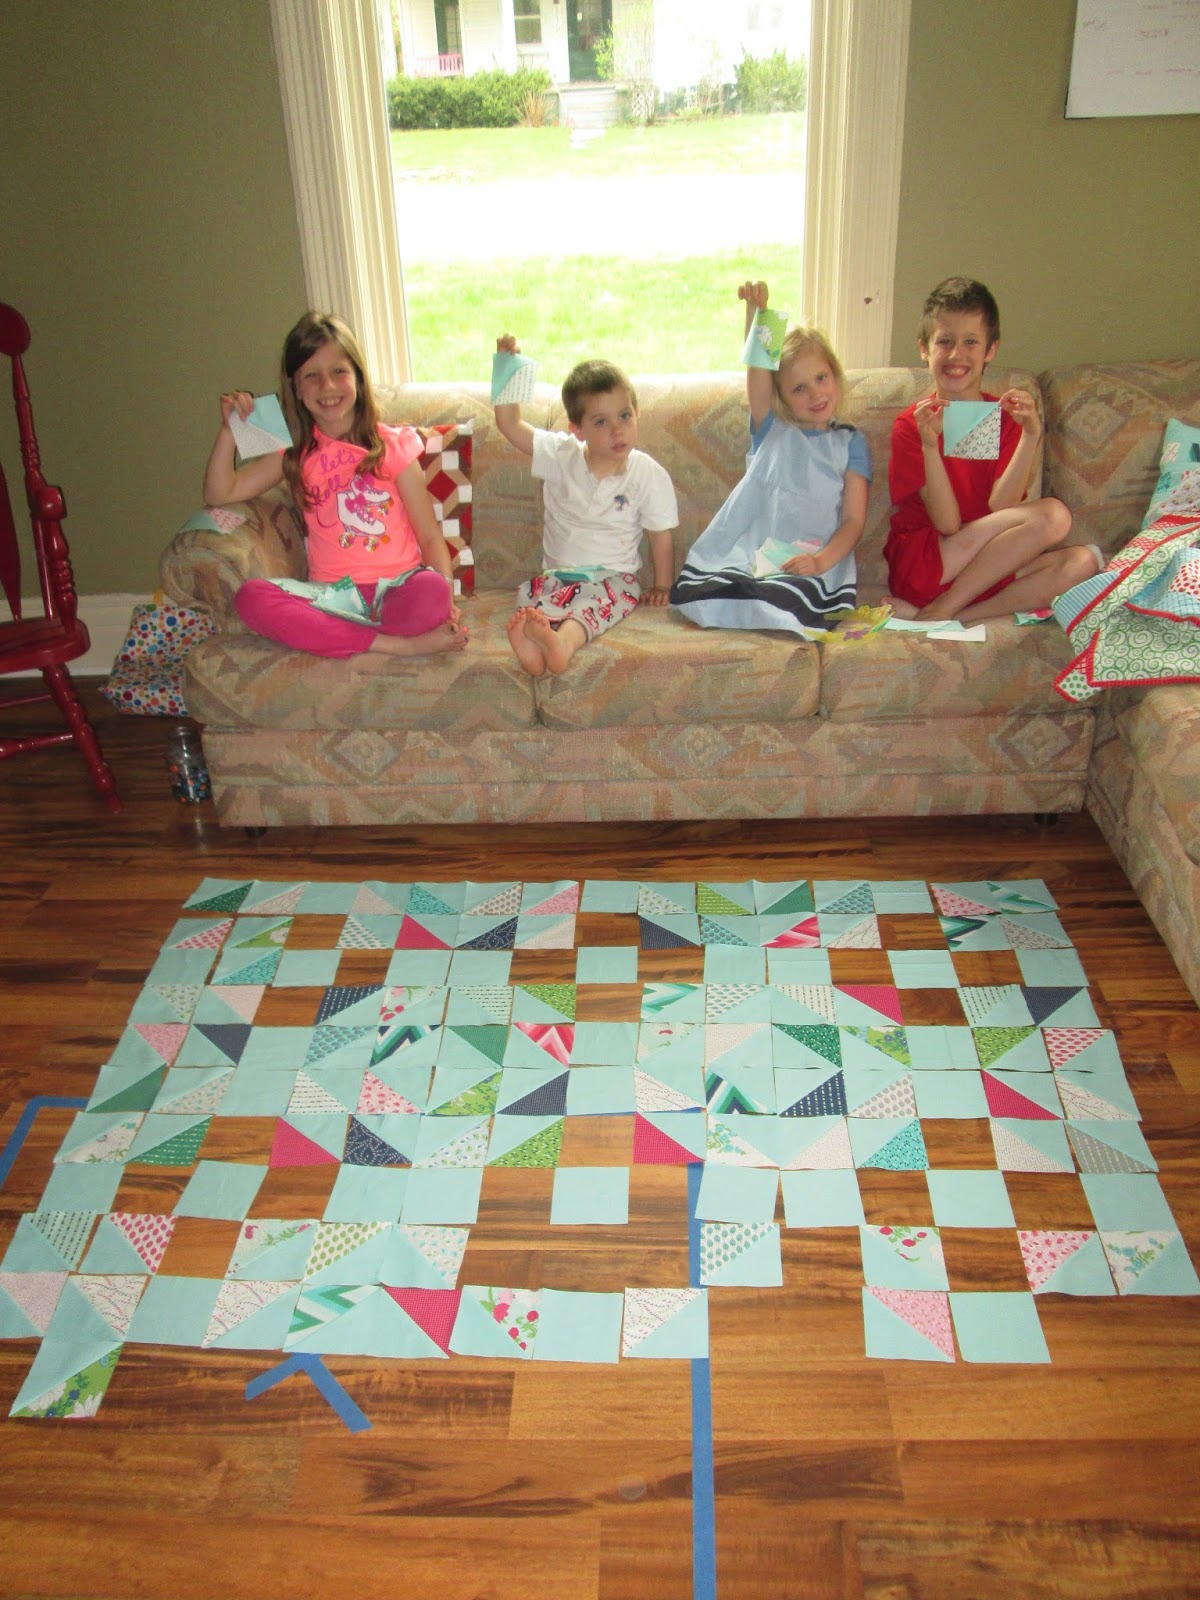
My kids helped with my last Christmas sewing project. We started a new tradition last year where they get a new pillow case to sleep on for Christmas Eve. I think it's a fun thing and they loved picking out their fabrics. All but the baby even sewed their own pillow case. They all felt so crafty and accomplished. It was a fun way to bring them into the holiday spirit and to teach them a little more sewing.

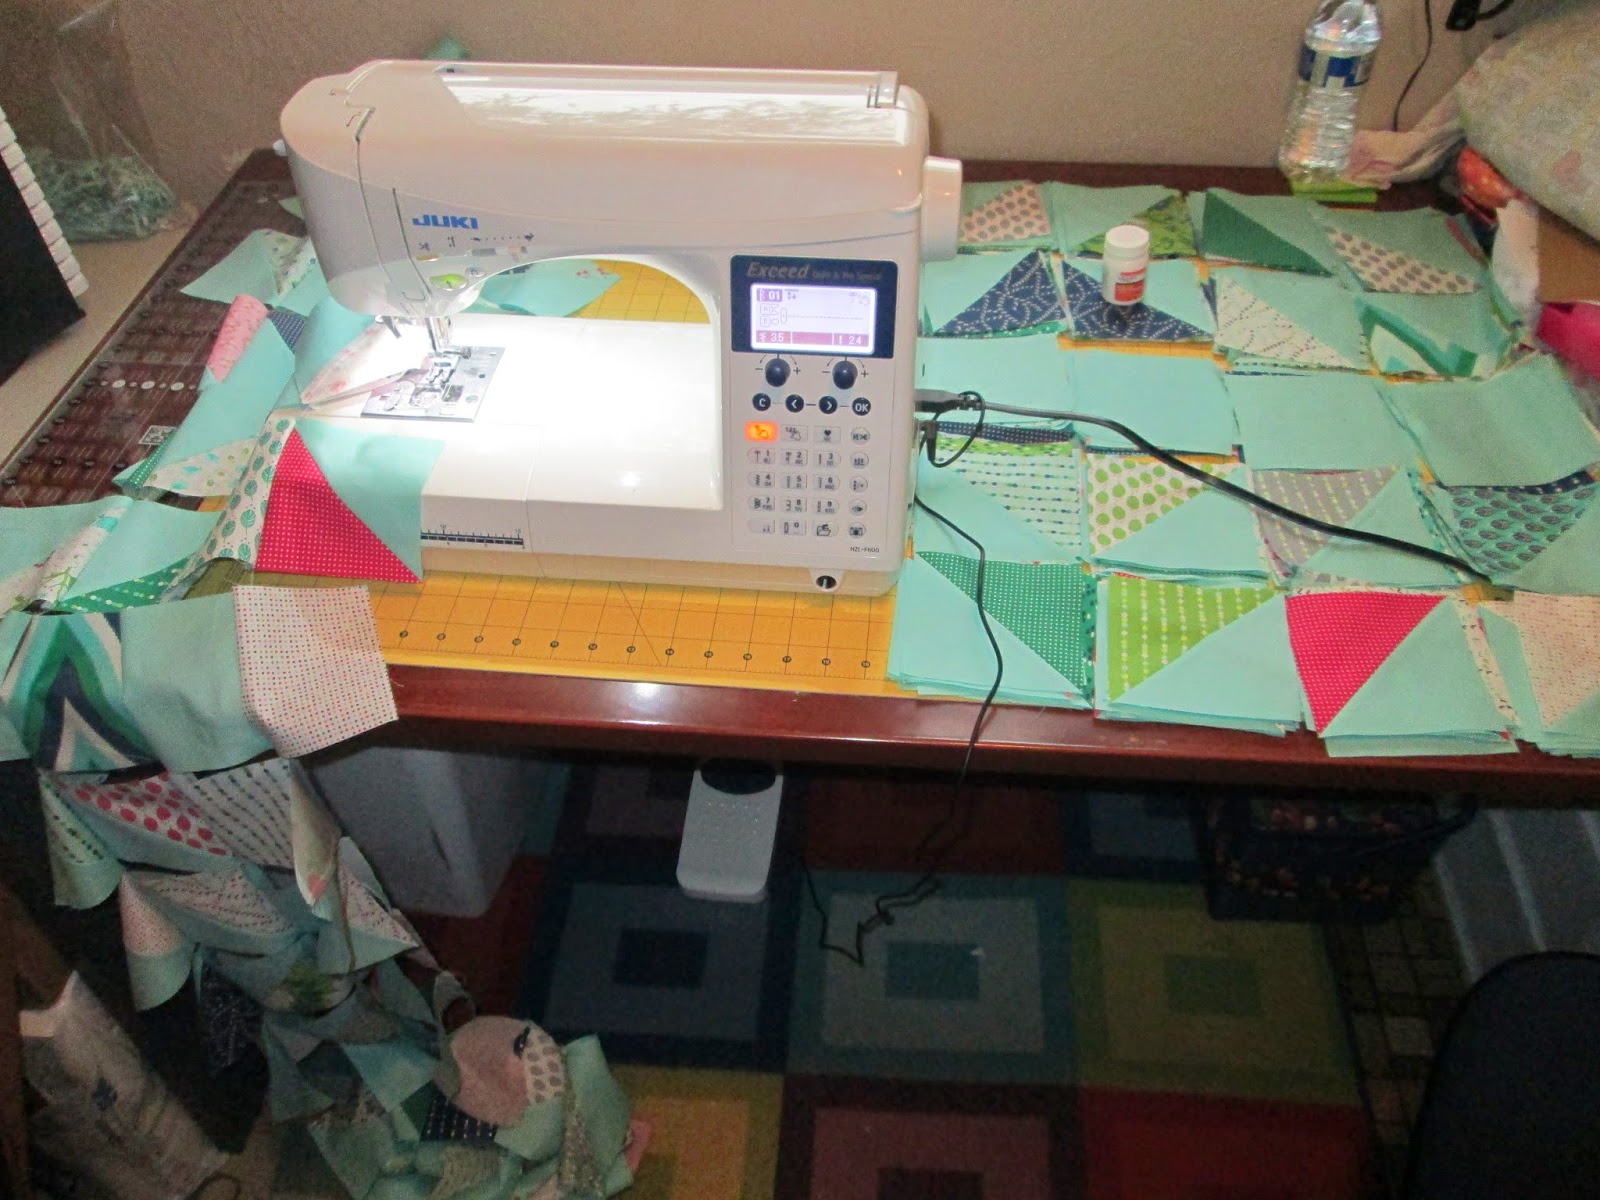
Oh and check out one of my favorite Christmas presents!! A pink itouch iron! Love! I have wrist problems so the repetitive motion of tipping the iron can be quite painful. This is such a cute solution! I did this hefty stack in no time and with no pain. As a quick aside I learned something important that I must share. Do not use distilled water in your iron! It said that on my users manual and I googled it to find out more. Apparently when you use distilled water in an iron it can superheat causing scorching and the mineral-free water will suck metal from your iron causing cracks and deterioration. There you go, my PSA for the day.

I had so much fun with my first IGminiswap quilt that when @mugirl113 was asking for someone to act as an angle to make a mini for someone whose partner backed out I jumped at the chance. This was so fun to put together and she should get it in the mail today or tomorrow. The extras were so fun to gather. I was poking around on her pinterest account and I found all kinds of inspiration.

When I saw this tutorial I knew it was going to be awesome so right from the start I decided to make one for her and one for me. Mine is the pillow. The spiral quilting isn't perfect but I love it anyway.

I've been loving this matchstick print from Cotton and Steel for so long and was just waiting for the perfect project before I snatched some up. I adore it on the back of this pillow.

Here's the tag on the back of the mini. This came from some yardage by Sweetwater for Moda. It has so many fun tags and I've used two already and I've only had the fabric for a week.

 Thanks for stopping by and checking out my fun sewing. It's been hard keeping all these secret projects a secret and I've loved being able to share them today. I'm linking up with my favorite Friday places...Finish it Up Friday and TGIFF.


Wednesday, September 24, 2014

Where'd My Moda Bake Shop Link Go?

Update: This problem has now been resolved. I let them know of the issue and this is the awesome response I received from Moda. I wonder if it is even from the same person as the ones at the bottom of this post?

modafabrics @julieschloemer Thank you for your response. We are also very happy to report that we had our developer look into this link issue and she was able to fix the .html links. Now the projects that have been pinned from our Moda Bake Shop should work seamlessly with our new site. We always appreciate questions and concerns so we can continue to improve our site to best fit our readers and customers. Thanks again and enjoy our new Moda Bake Shop.


Sometimes the phrase "epic fail" really fits a situation. While the newly redesigned Moda Bake Shop site is lovely it has a major flaw. All the hundreds (thousands?) of Pinterest links are now broken. All bookmarks also lead nowhere. It says "Page not found."

Yes, yes it is. Embarrassing and a huge problem. Every link that has ever been saved is now wrong. Every pin on pinterest, every bookmark on every computer, and even Google results lead you to the above page.


If you happen to remember the actual date of the post then you're covered. The new links include this extra tidbit of information. The old links just have the year and month. You can do a direct search on the Bake Shop's site but that's the only way you're getting to your tutorial - and that only if you remember what it's called. Otherwise you're forced to scroll through five years of recipes to find the ones you want - no thanks.
I only discovered this as I created a link earlier today and one of my lovely followers pointed out that it didn't work. I'm always double checking my links to make sure my sources are cited so I went back and sure enough, not functioning. It took me over six hours to solve the problem. You're welcome.

Would it be tacky to ask for some sort of reward for discovering this little tidbit of information? Maybe? Horizon Fat Quarter Bundle? A girl can dream.

Update: You can also make the link work by taking off the .html on the end of your link.

Before I wrote this blog I let the people at Moda Bake Shop know of my problem. Here's how that went...

julieschloemer @modabakeshop Your redesigned shop has changed all of your links. Thus all the pins and bookmarks that everyone has created ever are no longer functional. #fail 
julieschloemer @modabakeshop The new links include a day in the date while the old ones do not. Thus making all links null and void.
modafabrics @julieschloemer We do applogize for any inconvenience this may have caused you and hope you will still enjoy all the great tutorials all the Chefs have provided for Free. We are continually working on improving the site and we will do everything we can to make the site as user friendly as possible. Thanks so much for choosing Moda Fabrics!
modafabrics @julieschloemer We are sorry you are unhappy with the new site. All the tutorials are still available on the new site. The links from the old site ended in .html, whereas the new site they do not have a .html in the link at all. Unfortunately, this is beyond our control. For example... OLD LINK: http://www.modabakeshop.com/2014/07/peppermint-swirl-christmas-tree-skirt.html NEW LINK: http://www.modabakeshop.com/2014/07/peppermint-swirl-christmas-tree-skirt/
julieschloemer @modabakeshop it is not that I am unhappy with your site. It is that every link ever is now wrong. Every pin, every bookmark for EVERYONE. This is a huge deal and will affect your site a lot more than it effects me. Anyone who tries to follow a link posted before today will not be able to find it.

julieschloemer @modabakeshop I wrote a clearer description on my blog. Link in profile.

Their solution seems to be to make us all change ALL the links everywhere. Impossible and crazy difficult. It also negates all the work I did to save all their stuff on Pinterst and bookmarks. Sure removing that .html seems like an easy fix in theory until I have to go and do it for all my links and every other quilter everywhere has to do it as well. It seems like it would be much easier to have them figure out some sort of forwarding system. Right?

If you've ever pinned anything of theirs to pinterest this affects you! Thoughts?

Wednesday, May 14, 2014

WiP Wednesday: Web Piecing

So, when I was piecing my several simple patchwork quilts late last year I discovered the awesomeness of web piecing. I didn't find a tutorial or anything I just did it and thought I was so clever, only to discover it was already a thing, but I'm still pretty clever. ;) So now I've applied that into so many of my other quilts that typically aren't pieced that way and I love it! I made two tops this week! I'm linking up with Freshly Pieced for WiP Wednesday.

So last week I just had a bunch of squares and trimmed HST. I got my small people together and we picked a layout. It was fun. I gave them each a pile of HST and then went down the row. Each handed me one and if it wasn't an exact match to the one next to it I flopped it in place. They're much better at random than I am.

With just a few minor adjustments we got this layout done! We needed an adjustment because my oldest daughter is too much like me and sorted her fabric so there was a lot of bold/dark at the top and a lot of low volume at the bottom. It made me smile.

Then we got to the web piecing. This was on Mother's Day - my fabulous hubby gave me the perfect day complete with sewing! So once the quilt was all laid out I piled the fabric by rows then put them in order on my table. Instead of doing it into twelve blocks I just sewed all the first two squares down the side and then continued sewing one square at a time down the columns. I used the totally high-tech method of a pill bottle to keep my place. I was always sewing the one above the bottle. When it was done I'd move the bottle down one and pick up the square that was under it. The system was perfect for keeping my place as my five cute munchkins needed me to stop and go a lot.

In the middle of all of this I found this awesome Supernova Friendship Swap! So basically you get with a friend, just one, and you each sew ten blocks of the Supernova quilt. Five to keep and five to trade. Then you make up the quilt with one extra for the back or a cushion. I couldn't wait!! Izzy from Dizzy Quilts and I are doing it together and these are more or less my fabric choices. I swapped a few of the Navy ones and added another green and a couple of purples. It's not too late to join if you're interested. If you don't have a friend to do it with Stephanie can hook you up too!

So back to the quilt... with the web piecing I finished it up super quick! It took maybe two days to put it all together. Can you tell it was super-windy for the picture? It looks like the words coming down the screen on Star Wars. I also like how you can't see my hubby's feet even though it's blowing like crazy in the breeze.

Here's a closeup of the awesome Color Me Happy fabric and the fun piecing. I love how this turned out! Now I just have to figure out how to quilt it. Suggestions?

This quilt went so fast I don't even have a picture of the progress. I pieced the 324 squares, ironed, and basted it in less than 24 hours. Woohoo! This is our I-Spy quilt and once quilted it is going to be our picnic/firework blanket. I'm so excited!
So that was my fun week. Hurray for web piecing! I hope to get the quilting started on a few of these and not get distracted by the fabric that is coming in the mail today and tomorrow, yeah right! Thanks for stopping by!

Tuesday, June 4, 2013

WiP Wednesday: Pirates and Other Progress

 I've had a lot of fun sewing the pirate quilt this week. My little man has been pretty jazzed about it too.  He loves to come in my craft room and talk to me while I sew but he loves it even more now that I'm working on something for him. I also made some great crochet projects too. I'm linking up with Freshly Pieced for WiP Wednesday.

I got the pirate quilt all cut out this week! As a bit of trivia my hubby always likes to know how many pieces go into a quilt. This one has 653.

I detest when patterns tell me I need too much fabric. I don't know why but it just seriously rubs me the wrong way. This pattern gave me a whole extra yard of the border fabric. Seriously, a yard! So I made a pillow case out of it. At least it was enough to do something with, right? There was also an extra yard of the white but at least that is super useful.

The pattern also wanted me to draw a line on the back of all 236 white squares so I could sew them corner to corner. I wasn't really feeling that so I used the fabulousness that is painter's tape and put in on my machine lining up with the needle. Then I just had to keep the corners lined up with the tape. It was a breeze and probably ended up being more straight than if I would have used the line on the fabric.

I didn't really have a goal for sewing this week but then my bobbin ran out and I could see the core of my spool of thread. I thought, okay, I just sew until the spool runs out. Little did I know how much thread these Gutermann 1000m spools can hold when it looks like they're running out! I did about 69 more feet of sewing. That is nearly all you see here. 42 are on the right and I did all those. The middle pile has 24 and I sewed all 48 squares to those. Then I also did 2 sides of all 59 in the last pile before I ran out of thread. CRAZY!

I also whipped up this adorable sheep hat for the baby. I thought I was done making hats for her but I saw this pattern and couldn't resist!

I'm also making good progress on her crochet blanket. The pattern goes from blue to pink six times with an extra blue row on the end so I'm just over a third finished.

Also I reached the seven month mark this week. I take belly shots once a month and just couldn't resist sharing the cuteness. I love how round I am and while I never get really big you can sure tell she's in there! As of this post only 56 more days until baby!
This week I hope to finish all the components of the pirate quilt and land on a layout. I also hope to make more progress on her crochet blanket and do a bit of scrapbooking. Thanks for stopping by!

Tuesday, April 9, 2013

Binding WInding Tutorial

Through my many years of quilting I have discovered some tips and tricks along the way that help make things a little easier.  I love to share those with others and this is one of my favorites because of the simplicity.  It involves some binding and a pen - that's it.

I've found that when wound like this the binding is much easier to feed onto the quilt and takes up less room on my sewing table.  Keep reading for an easy way to wind it up.

Start with a pen and your length of pressed binding.

Slip the edge that you will end while sewing into the cap of the pen.

Now twist the pen to wind up the binding.  The pen gives you something nice and big to hold onto while winding.

Here's another angle of what it looks like just starting to be wound.

Keep twisting and make sure to keep it tight.

Keep winding until it is all wrapped around the pen.  This one is large because it is the binding for a queen sized quilt.  Put a pin in the end to hold it all together.

Grab the pen cap with one hand and the binding roll with the other and simply pull out the pen.

Voila!  A very easy and stress-free way to wind your binding.

Repeat as desired. - Yeah, I'm a bit behind on binding my quilts.


Wednesday, March 13, 2013

Easy Quilted and Lined Zipper Pouch Tutorial

I have always had a great fear of zippers.  I don't exactly remember where this fear originated but I figured it was time to nip that in the bud.  I was so successful in my endeavor that I decided to write a tutorial so others can join me in my success.  The tutorial is for a quilted and lined zipper pouch - seen below. Be sure to read through the entire tutorial before starting.

I wanted to make something fun and useful with my Nancy Drew fabric.  My Nook Tablet needed a new case and the idea was born!

Supplies: Four pieces from a layer cake or four pieces about two inches larger than you want your final product to be.  You'll also need batting and a zipper.

To make the quilting step easier I spray basted my fabric to my batting after cutting the batting slightly larger than my fabric.

Quilt just the one layer onto the batting.  Be sure to use the fabric you want on the outside.  I'm more or less new to free motion quilting and I decided this would be the perfect time for me to try out my skills.  The diagonal wavy lines I attempted turned out pretty good.

Cut to size. It is very important that you do this AFTER you quilt because your piece will bunch up and shrink a little with the quilting. Make sure you cut your non-quilted or lining pieces down too.


Ready to sew! Just FYI, for the Nook Tablet I needed the pieces to be 9.5" by 7.5" with a 6" zipper.

Layer and sew on zipper. Put your lining piece right side up.  Then the zipper also right side up.  Finally place the quilted pieces with right sides together.  See picture.  Sew with a zipper foot lining up with the edge all the way across with the needle closer to the teeth. Tip: When you get to the zipper pull it's really hard to go around.  With the needle down stop and move the zipper pull out of the way and keep going.

Layer on the other pieces and repeat.  Again start with the lining piece right side up.  Then place the side you just sewed with lining sides together with the zipper on top.  Finally place your quilted piece on top.  See picture.  Once again sew all the way across with the zipper foot on the edge and the needle closer to the teeth.

Press away from zipper teeth. This step makes the top stitching much simpler.

Top Stitch. Sew 1/4" on either side of the zipper and go all the way across.

Your project should now look like this.

Place matching sides together. The lining should go with the lining and the quilted with its pair. Make sure the zipper is unzipped so you can flip it after you sew around.

Sew 1/4" around. Leaving about a three inch hole (mine is about 2" and was slightly small) start on the lining side and sew 1/4" inch from the edge all the way around.

Flip right side out. Using the hole you just made turn the whole thing right side out.  There will be a hole left in the binding which you will take care of in the next step.  Make sure to push out your corners so they lie flat.

Sew up the hole in the lining. Since it is going to live at the bottom of my bag I just did a top stitch 1/8" away from the edge.  If you really care you could hide your seam.

Bask in the glory of a job well done. Hurray!  You made a quilted and lined zipper pouch!

Take Pictures.

Put stuff in it. The End.