Saturday, July 12, 2014

Michael Miller Challenge Quilt Finish

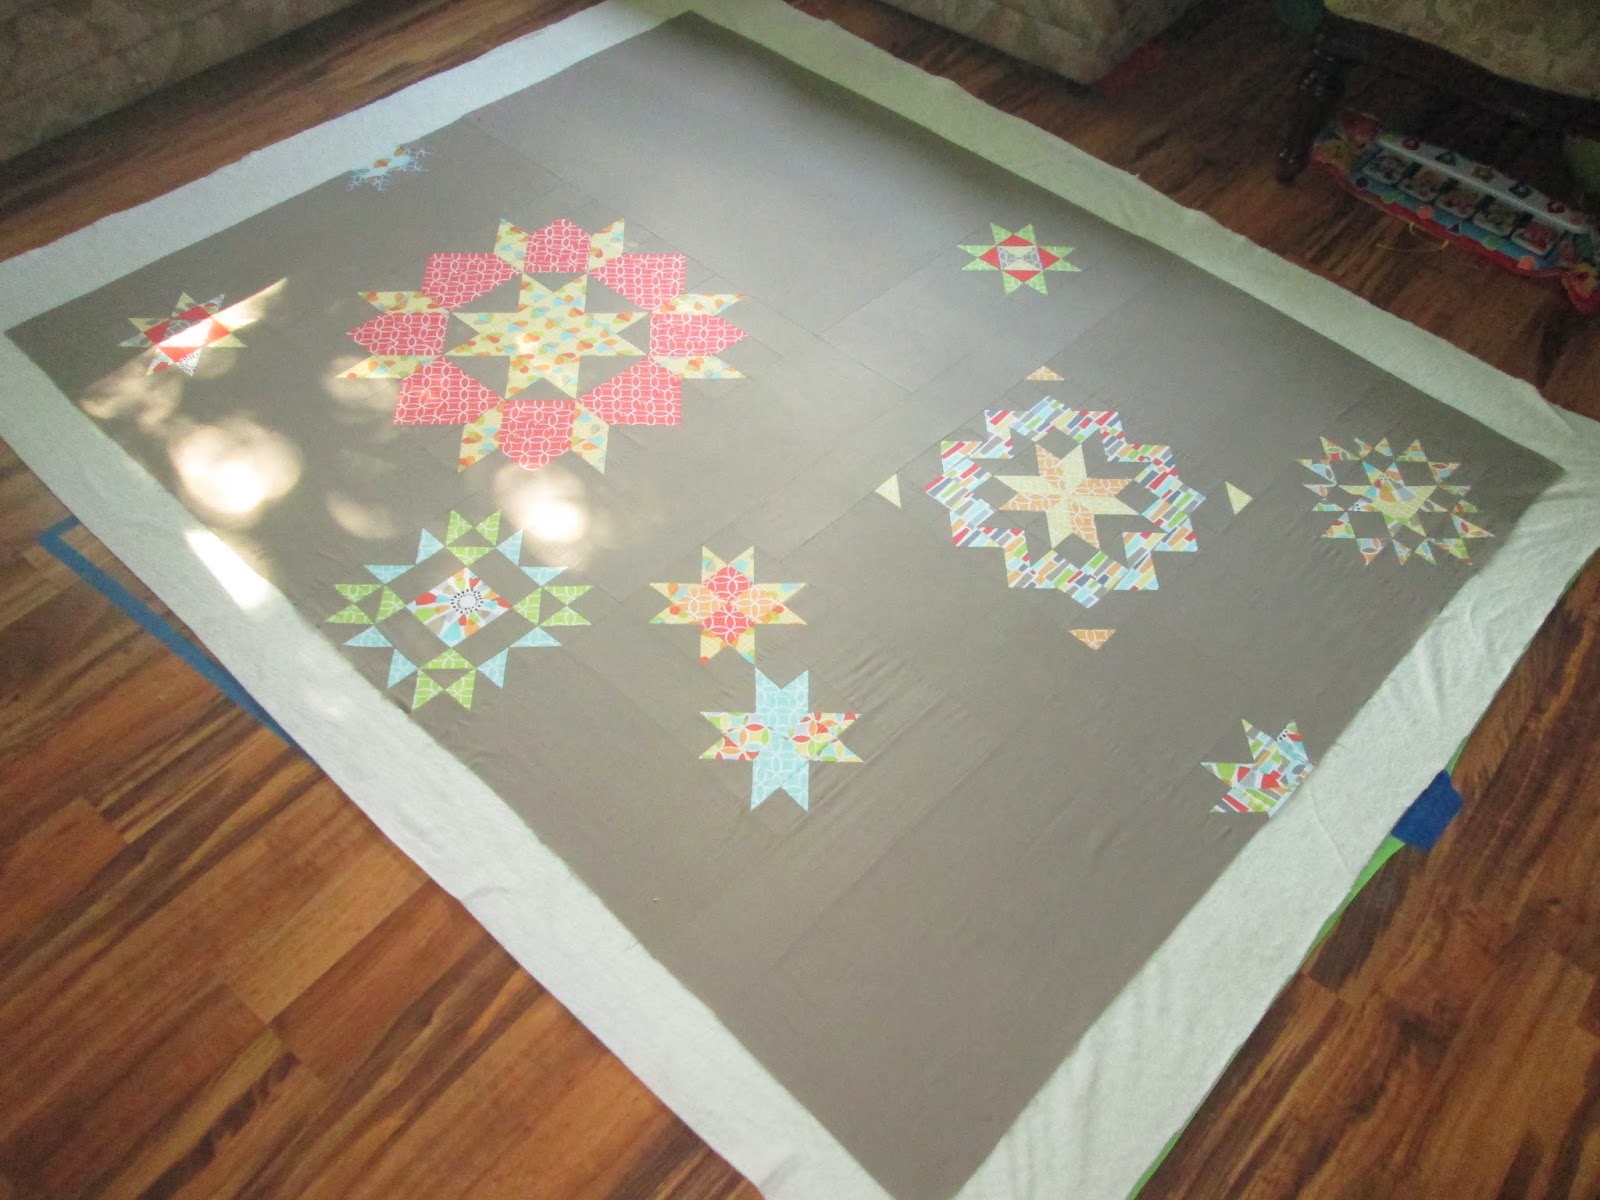
It took me a while to get the inspiration I was looking for on my Michael Miller Challenge quilt. I had several ideas but none that I was really in love with. Then one day I was poking around on Pinterest for quilt and kept seeing stars that I loved - an idea was born. I wanted to do a quilt with several of my favorite stars from around the internet with lots of negative space. It finished up 60" by 76". This quilt is on my Q3FAL list (posted here).

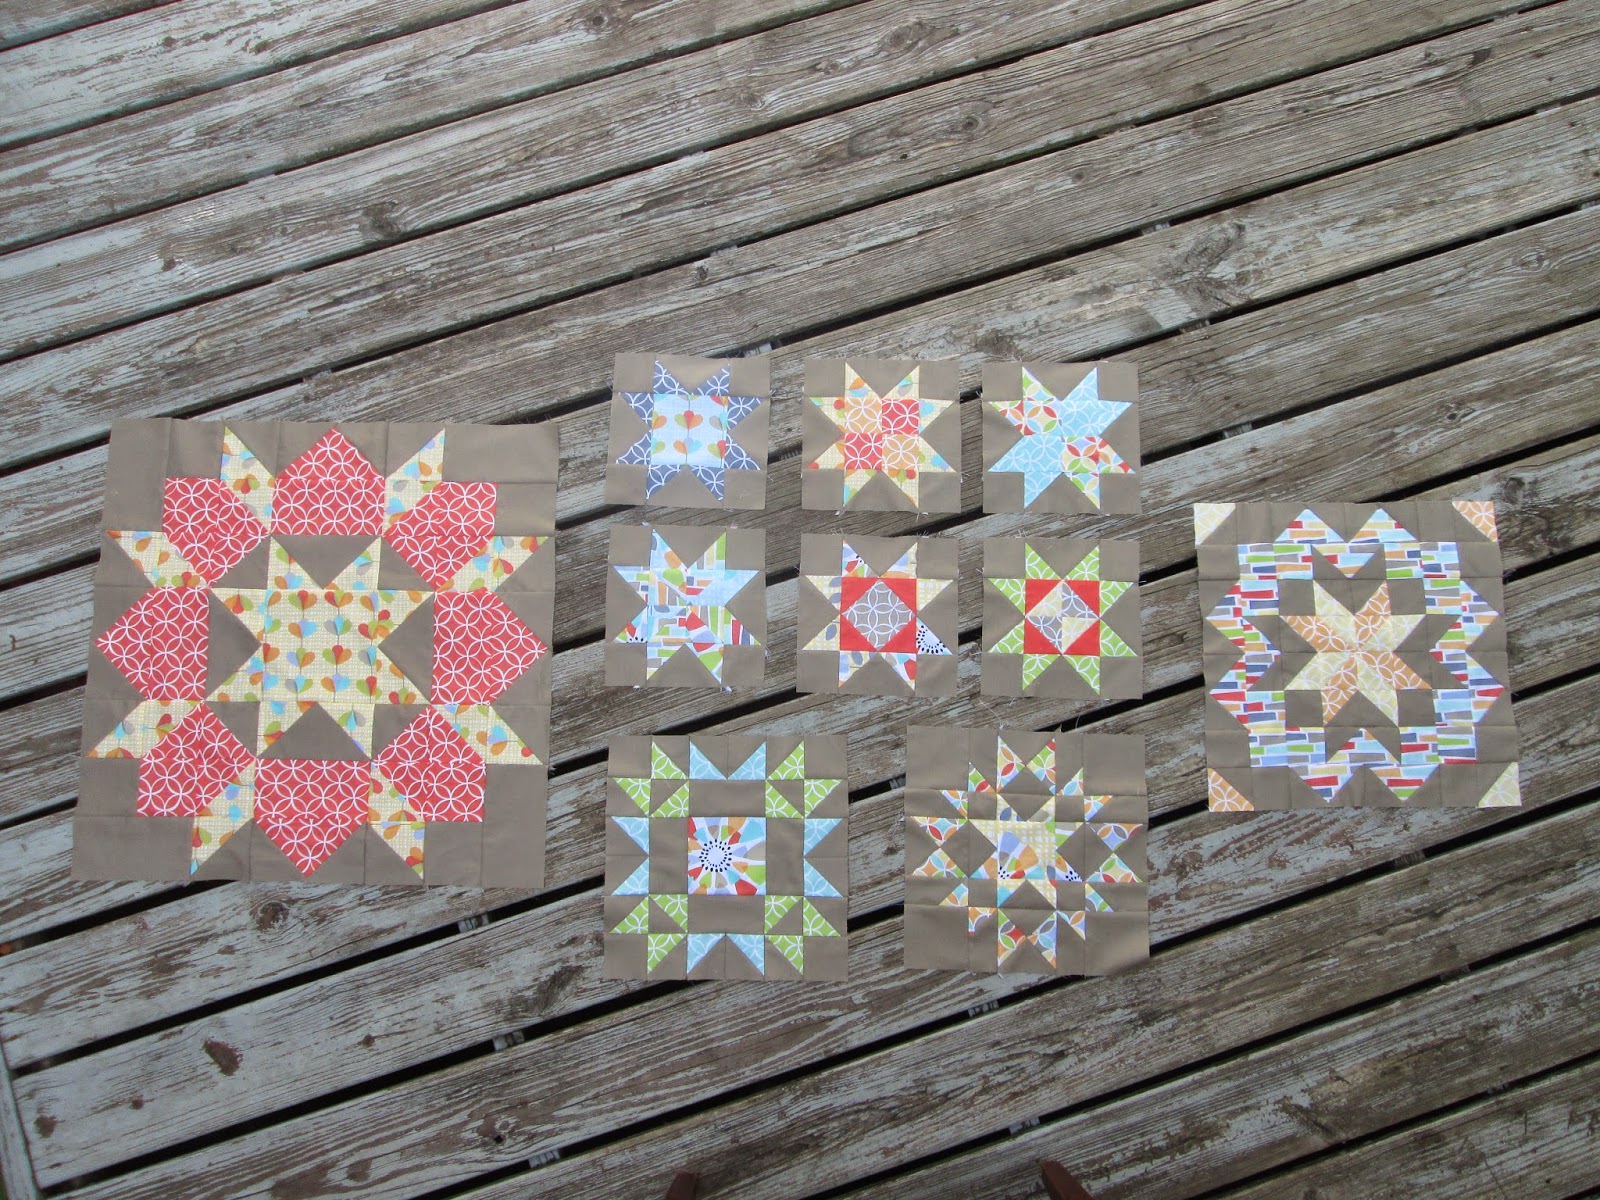
Here's what I ended up with. I'm pretty in love with it. I picked out my stars and then was amazed when I looked in my new book "Vintage Quilt Revival" and there was a pattern with a bunch of negative space that used the same size and number of blocks that I wanted! This is the Sugar Snow quilt layout substituted with stars of my own choosing. I picked (largest first) Swoon, Star Surround, Green Mountain Star, Arizona Star, and the small six are from the Stars QAL.

This little star was one from the Stars QAL. She offered several different size options but I wanted 8" blocks (not a choice). I was surprised at how easy it was for me to do the math to shrink these down. They were pretty fun blocks to make.

I'm a big fan of minimal quilting - especially in straight lines. I was a little tempted to do something a bit more intense for this quilt because it was for a challenge but I liked staying true to myself better. I bound it in the same "dirt" (their name not mine) fabric that I used for the background and then the backing is a MM solid green. Can I just stop here and mention how much I love the feel of these MM fabrics? They are so soft! It was the first thing I noticed when I got my fabric.

My usual quilt holder was at work and I seriously couldn't wait to take pictures and share this one. So, I enlisted my oldest kids (age 8 and 7) to hold this up. They're obviously too short so I grabbed a pair of chairs and they did really well. I heard a lot of moans as I took the pictures from the behind the quilt and it cracked me up. I bought them off with a piece of candy and all was forgiven.

Here's a closeup of my favorite block - the swoon. I've had plans to make a swoon quilt ever since I saw the original several years ago but haven't gotten around to it yet. This was my first attempt at it and I'm pretty much in love. It wasn't any harder than I imagined and it looks so cool!
Well, there you have it. My kids all think I'm totally going to win first place but I'd really be surprised by that. I love this quilt and it was fun to try new stars and negative space - something I rarely, if ever, use. It was a fun challenge and either way I got a great quilt out of it! I'm linking this up over at Fabric Tuesday, Finish It Up Friday, and TGIFF

Thursday, July 10, 2014

Christmas Pillow Finishes

Miya and I finished our Christmas pillows today. It was a bit of a long day of sewing as neither of our tops were done yet but so worth it! Our guild meeting with the theme Christmas in July is on Thursday so we even finished with a week to spare! This is my first finish from my Q3FAL list found here.

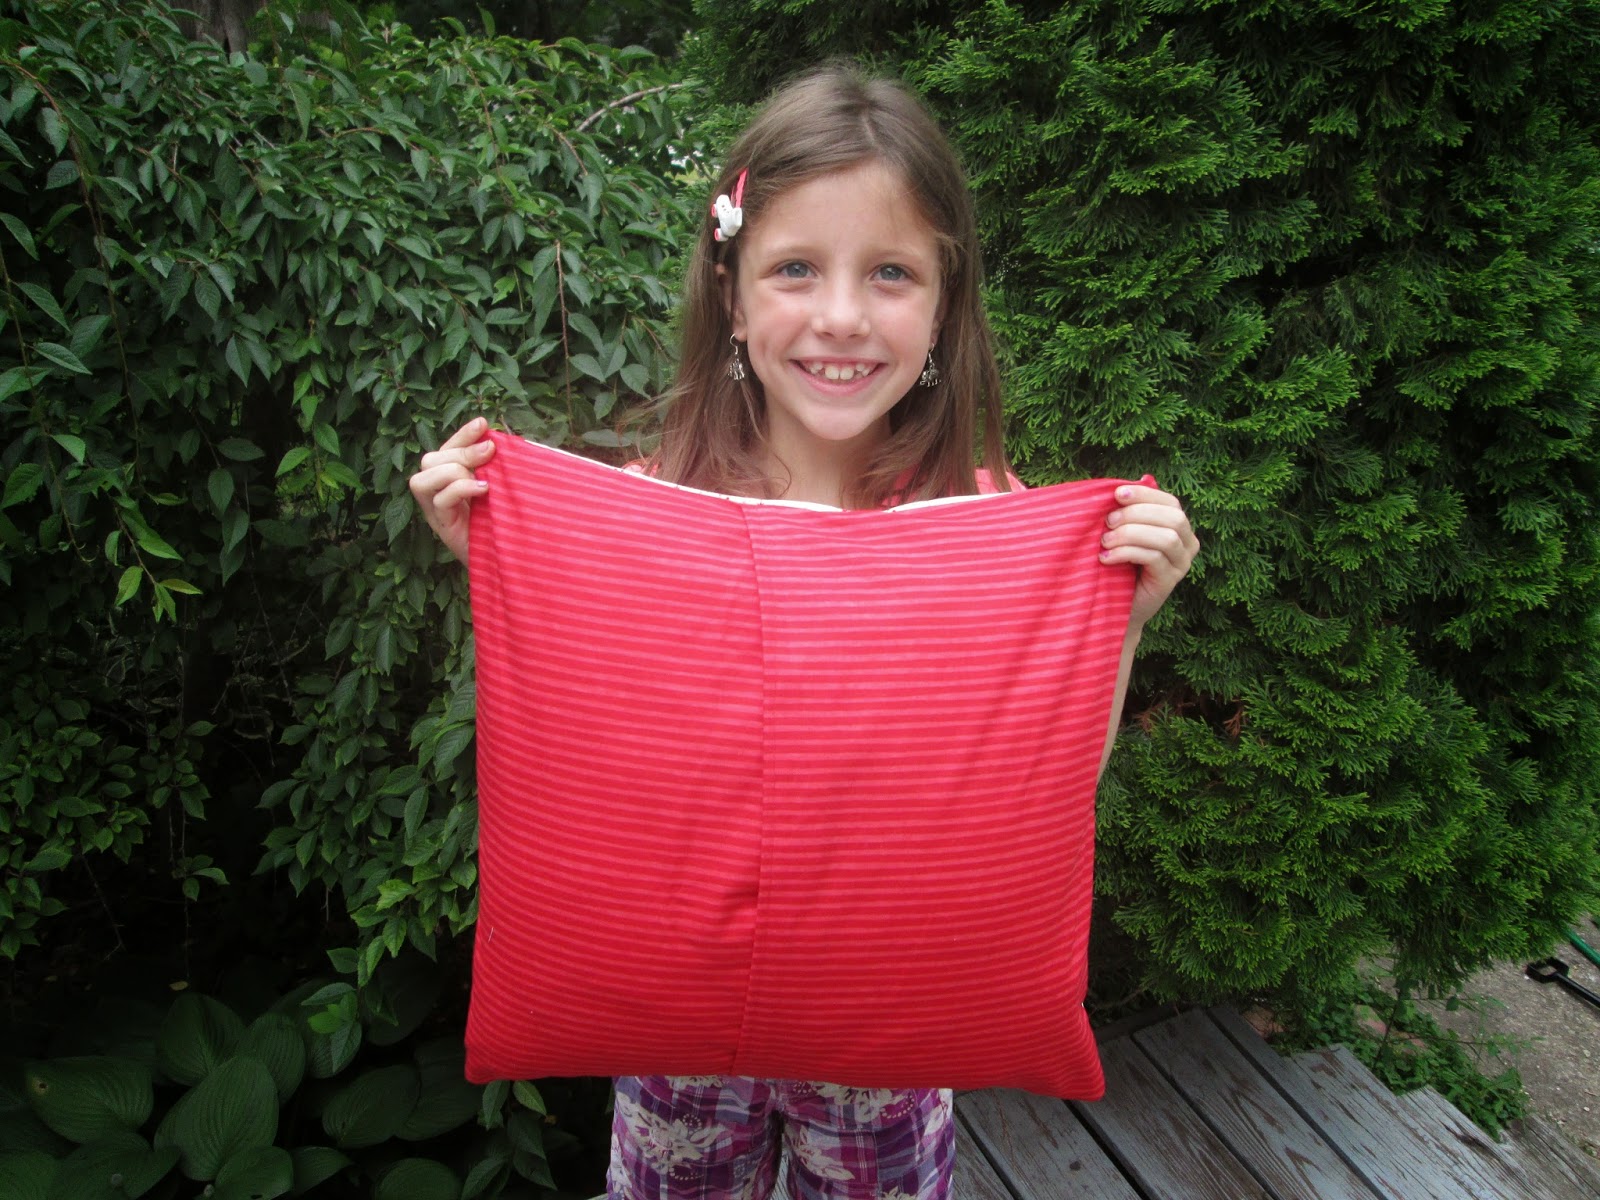
Here's Miya so proud of her pillow top. She did ALL of the work herself this time. That includes cutting, sewing, and pressing! For more on this check out this post.

We both finished our tops just before lunch time and then basted them.

We both also managed to finish our quilting today! Miya wanted snowflakes on her pillow and to use red thread. We found this stitch on my machine that was very like a snowflake and we ran with it. We marked the quilt and she followed the lines so well!

The backing, which she also did all by herself, is envelope style red tonal stripe from the same Ready Set Snow line.

I loved this picture too much not to share.

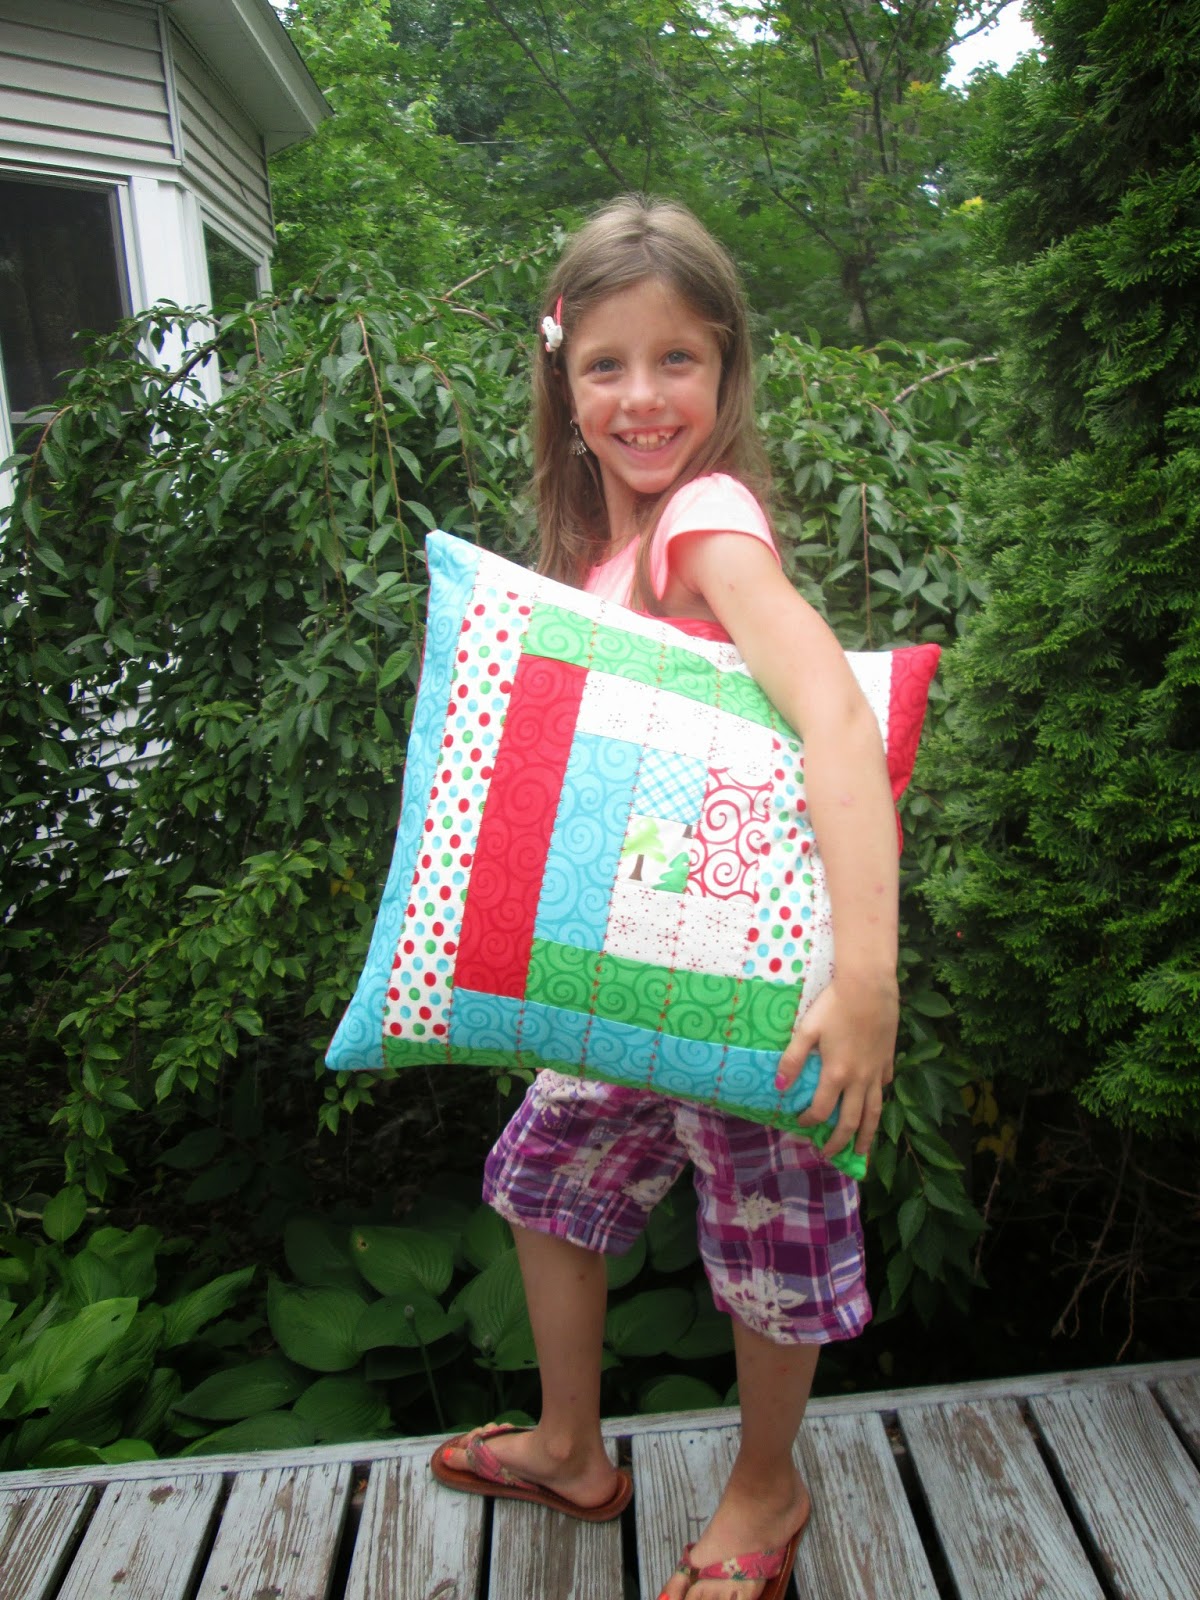
Here's my finish. Once again I used the Contact Print Pillow tutorial. I really love how this one works up. It really shows off the fabric which is In From the Cold by Kate Spain for Moda. I think the red background was a little risky but I love how it turned out. It looks so festive!

Here's my fun print on the back also from that line. I really love it!! I also did an envelope style back.

Here are our pillows together looking so festive and adorable. I can't wait for the meeting to show off my little girls work!

Here's a closeup of her quilting. I'm just AMAZED at how straight she stayed.

Here's a closeup of my quilting. I just did some straight lines in the horizontal stripes of the pillow about 1/4" apart.
I adore having a little sewing buddy and I can't believe how quickly she is progressing. I also love making fun little decorations for the house. Pillows are such a fun way to add to the festive feel! Thanks for stopping by and enduring my gushing! I'm linking up with TGIFF and Finish It Up Friday.

Tuesday, July 8, 2014

Third Quarter FAL Goals

Once again I have quite the list for my finish along goals. I tried to narrow the list down to ones that I am more interested in and that I actually have a desire to work on. That took it down to 18. Here we go...

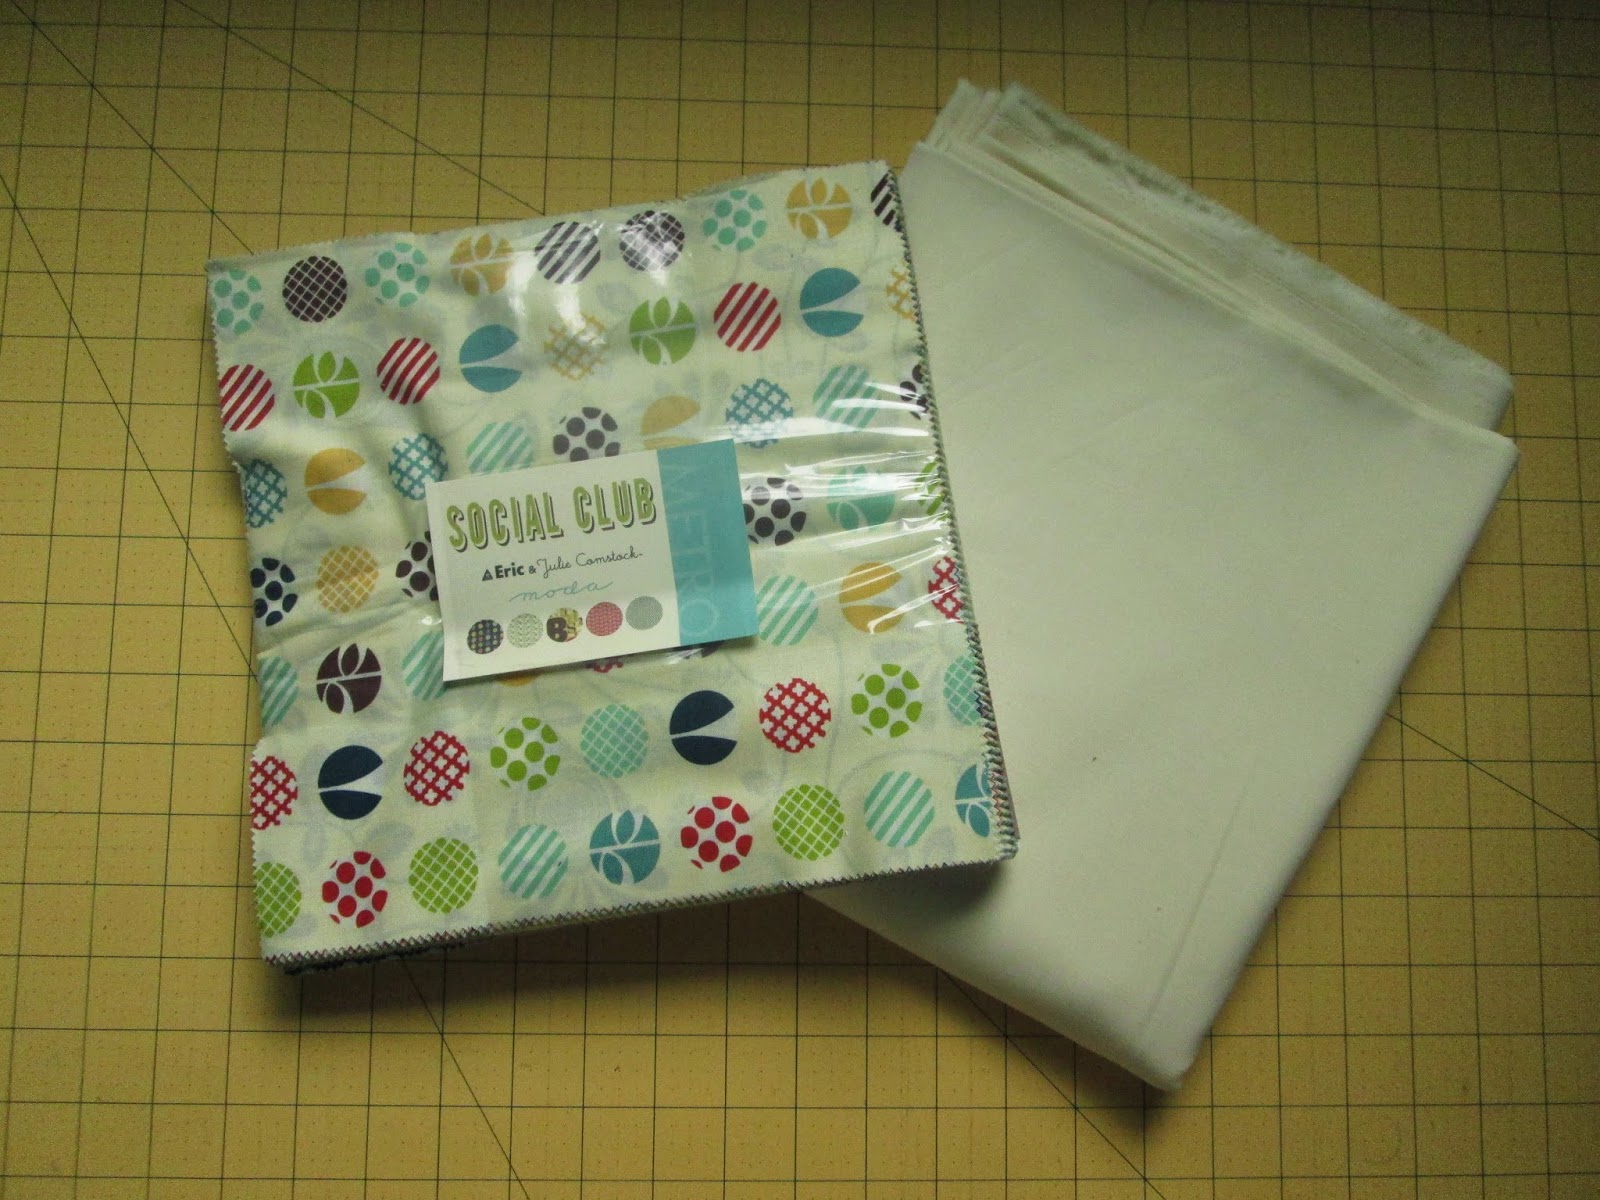
#1 Social Club Quilt - They are destined to be a quilt for my niece who is getting married on August 2nd. I'm using the layer cake to HST method I found at Material Girl Quilts and doing a block from her Layer Cake Sampler. This is also my July ALYoF project.

#2 Christmas Pillow - I'm going to turn this cute little candy pack into the Contact Print Pillow found over at Crazy Mom Quilts. Our guild is having a Christmas in July meeting so I want to get this one done quickly in time for that.

#3 Chirp Chirp Quilt - I used the Line Dance pattern again. This is the last one I've got planned with that pattern. It's so fun and makes a good size quilt with only one charm pack. It just needs to be quilted and bound.

#4 - MQG Challenge Quilt - I need to get on this one and I think I've finally decided how to quilt it. I can't wait to get going! It's due on the 25th of July.

#5 Mixed Bag Charm Pack Cherry - This was a fun pattern and so fast and interesting. I also used brushed cotton for the first time and love the feel of it. I need to quilt and bind this one.

#6 Octopus - I had this idea a while ago of making a cute stuffed toy octopus with buttons on the tentacles for fun texture. I'm finally making that happen for my baby's first birthday later this month. I found a cute pattern here.

#7 BYU Quilt - I went to college at Brigham Young University and just adored it. I've wanted to make a BYU quilt for quite some time but I just didn't know how to do it. Then I saw this and fell in love and will now make my own - just a little bigger. It was so fun to collect all the navy prints. Navy is one of my favorite colors.

#8 - Kate Spain Quilt - I was part of a Kate Spain charm swap earlier this year and I think I finally landed on what to do with them. I supplemented with some charm packs from lines that weren't as represented and I'm going to follow this tutorial.

#9 Mint To Be Swoon - Honestly I don't know if I'll even attempt this one but I'd really love to so I'm putting it on the list anyway and we'll see what happens. It's going to be a full size swoon quilt with these cute fabrics from the Mint To Be line.

#10 April Showers Quilt - I'm going to turn this lovely bit of fabric into a quilt for me using this Four Squared Quilt tutorial.

#11 Zigzag Quilt - This is going to be a pretty basic zigzag quilt for my Etsy shop. I have the squares made I just need to throw it together and finish it off.

#12 Road 15 Quilt - These will be another Happy Weekender quilt but this one will be for me. I recently made this pattern and then I fell in love with this fabric and just had to have a quilt out of it for me.

#13 Road 15 Pillow - I may have a bit of an obsession with the Contact Print Pillow. It's just so cool looking, easy, and cheap that I can't help myself. This will be my third go.

#14  Serenade Quilt - This is going to turn into the Twists and Turns quilt. I've had this fabric for well over a year now and even had a pattern I bought it all for. Well, I fell out of love with the pattern but still love the fabric so we're going to try again and see what happens.

#15 Scrumptious Quilt -  This Scrumptious is going to be the Pinwheel Baby quilt from the Moda Bakeshop. The pattern for this one is so adorable complete with tiny prairie points.

#16 Simply Style Quilt - I missed the QAL but I'm going to use this layer cake and the yardage to join in the Layer Cake Sampler over at Material Girl Quilts.

#17 Cowgirl Quilt - These adorable fat quarters are going to turn into a baby quilt using the Starburst Pattern from Melissa at Happy Quilting.


#18 Nancy Drew Quilt - This one has been tragically forgotten for quite some time now. I made it as a practice FMQing quilt and did 11 of 36 squares and then my machine broke. I need to pick it back up and finish it most because I could use the practice.


So there you have it. I've been finishing about half of these crazy lists I've been posting so that's pretty good! I've been averaging 10 finishes per quarter so I'm interested to see how this goes. I'm linking up to the Q3FAL goal post and WiP Wednesday.

Thursday, July 3, 2014

Bluebird Park Finish

I simply adore this fabric line! It's Bluebird Park by Kate and Birdie for Moda. I used the Line Dance pattern again. I also tried a new quilting technique with the wavy lines. This quilt is probably the last I'll finish off my Q2 FAL list (found here).

So here it is. I adore this pattern and have used it several times. The quilt measures about 41" by 49" and is made with just one charm pack.

Here's a closeup of some of my favorite prints in the line.

You can see the quilting here. I also discovered my awesome Juki has one of those quilting guides to help you maintain an even distance. It works amazingly well and it didn't shift at all during the whole quilting process.

I love this print for the back too! I'm all about making the back as fun as the front by using interesting fabric.

Here's a closeup of the fun backing. I just love these cute little animals in the park!
This quilt is available in my Etsy shop and it can be found here. I'm linking this up with TGIFF and Finish It Up Friday!

Wednesday, July 2, 2014

WiP Wednesday: Seeing Stars

I finished up the top of my quilt for the MQG fabric challenge. I am so excited about how the stars and top turned out! I also got fabric for two new projects, both of which have to be done by the end of this month along with the MM challenge quilt. It's going to be busy around here!

These are the next two stars I finished for my quilt. I love how they look on the "dirt" background fabric. It's a fun color and a big change from what I usually use. The one of the left is the Arizona star and the one on the right is the Green Mountain Star.

My five year-old took this picture of me. She said that I take a lot of pictures of what I make but none of me making them. I thought it was cute that she wanted to document me.

I really like these little stars! They come from a Happy Quilting QAL called Stars from a while ago. To fit the layout I wanted I had to reduce these stars to 8" finished. I'm surprised at how easy that was for me to figure out! It opened up a lot of possibilities for different quilt/block sizes.

I finished all the stars for my challenge top and love this picture of them all together! I did a Swoon, a Star Surround, and the ones I mentioned above.

For the layout I picked a pattern from the new book Vintage Quilt Revival. I adore this book! I just bought it a couple of weeks ago and have poured over it several times. The quilt in the book has all of the stars matching but I wanted to make this a collection of my favorites from around the internet.

I just got these fabrics yesterday. They are destined to be a quilt for my niece who is getting married on August 2nd. THIS YEAR! I volunteered to make her a wedding quilt before I knew the date. They are moving fast! They've been together for quite some time now so it's not like their rushing but I sure wish I had a bit more time. I'm using the layer cake to HST method I found at Material Girl Quilts and doing a block from her Layer Cake Sampler. Since it has to be done by the end of the month anyway I'm making this my July ALYoF project.

I adore all things Kate Spain but I already had a Christmas quilt so I didn't know what to do with this line of hers. My guild is having a Christmas in July meeting so I decided to whip up a quilt Contact Print Pillow for the meeting on the 17th. It's a really easy pattern and all the fabric for this was around $12. I can handle that much! It's a nice way to use a fun collection from one of my favorite designers and not break the bank. However, I think I'm slowing becoming a crazy pillow lady. I've only made five so far, two of them only for Halloween, but it's sort of addicting.
That's it for this week. The star quilt took up most of my time. I have NO idea how I'm going to quilt it and I'm waiting on my thread to be delivered. I hope to make some progress on the other two projects in the mean time. Thanks for stopping by and I'm linking up with WiP Wednesday!

Friday, June 27, 2014

Apple Jack Quilt #2 and Spiral Quilting Tips

I had a lot of fun quilting in a spiral again. I did a few things differently this time and it worked so much better! I'll start off with what I learned and then you can see the quilt in all its glory. ;) This quilt is on my Q2 FAL list (found here).

This is the first one I quilted. I went counterclockwise not thinking it was a big deal which way I went and I ended up with this near the end. All I could think was that it's a good thing this is a baby quilt!

Round 2 - CLOCKWISE!! Who knew it would make all the difference. This is in the middle of the quilt and it just kept getting better and better. It was SO SO much easier to feed the quilt through and even stay on a spiral.

What I didn't do but should have was to draw the spiral with a fabric marker and then trace and remove. Sadly, I don't have one of those but it's coming in the mail. What I DID do was switch over to my walking foot much sooner than the last one. Last time I went for a radius of about 6" before I changed over, this one was more like 2". I thought it would be hard to turn with the walking foot but it's really really easy. Switching earlier meant that my spiral looked a lot more uniform sooner - excellent!

So here it is - the Apple Jack Jelly Roll Jam quilt #2. I like how I separated out a lot of the blues and aquas for this quilt. I like the feel of it.

I also love the apple binding on this one. The corners are also much improved thanks to a guild class on binding. She told us when we're doing our fold-over for the corner (when first sewing the binding to the quilt) that you should extend past the quilt a tiny bit, 1/8" or less, and that will give you more fabric when you flip it over and make your corners look more like a right angle.

Just a fun artsy picture with the cute fabric. I really like taking them from this angle.

I also learned how to get an awesome picture of spiral quilting. Go to the second worst place for lighting in your house and give it a go. I was taking pictures and this storm came in but I didn't have a good shot of my quilting. I went inside and flopped in on the floor and was amazed at how the quilting was popping. So I grabbed a picture to share.
This quilt is available in my shop here. Anyway, I hope my tips helps someone. I was so afraid of spiral quilting and then I just went for it last week and I'm so glad I did. I just have to remember - CLOCKWISE! I'm linking up with Finish It Up Friday and TGIFF.